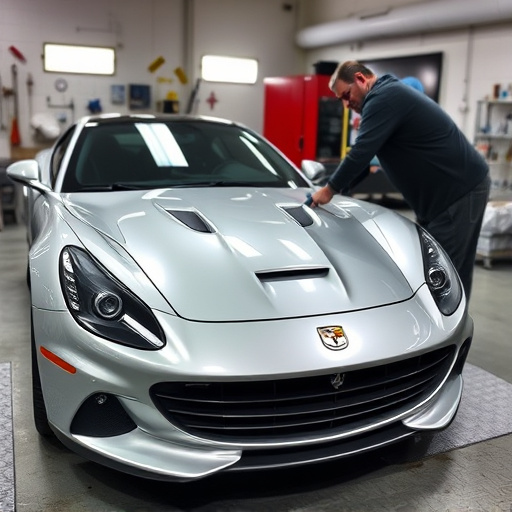


The Tesla Model 3's front fascia requires careful repair for damages like cracks, chips, and deep dents, which can range from simple touch-ups to extensive replacements. The process involves assessing damage, using tools for dent removal, installing new fascia panels, and ensuring proper headlight alignment for safety and aesthetics. Meticulous detail is crucial for optimal performance and visibility during driving.
“Discover how to expertly repair and restore your Tesla Model 3’s front fascia with our comprehensive guide. Learn about common damage types and their causes, especially from stone chips and debris impact. We provide a detailed, step-by-step process for replacing the front fascia, ensuring a seamless fit. Additionally, we emphasize the importance of a proper headlights alignment and fitment check, crucial for both safety and aesthetics. Get ready to tackle your Model 3’s front fascia repair with confidence.”
- Understanding Tesla Model 3 Front Fascia Damage
- Replacing the Front Fascia: Step-by-Step Guide
- Ensuring Proper Headlight Alignment and Fitment Check
Understanding Tesla Model 3 Front Fascia Damage
The Tesla Model 3 front fascia is a prominent feature that not only enhances the vehicle’s aesthetic appeal but also plays a crucial role in protecting its sensitive components. Damage to this area can arise from various sources, such as road debris, minor collisions, or even severe weather conditions like hailstorms, which are quite common in certain regions. Recognizing different types of front fascia damage is an essential first step in considering Tesla Model 3 front fascia repair.
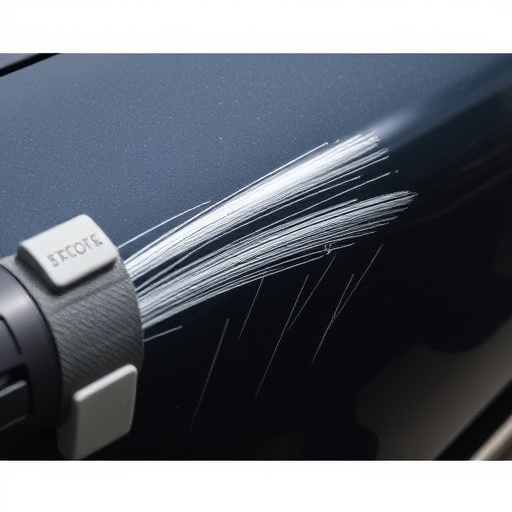
Common issues include cracks, chips, dents, and scuffs on the bumper, grille, and surrounding panels. In some cases, these defects might be superficial, like minor scratches or light scuffing, which can often be remedied with simple touch-up work and car paint services. However, more significant damage, especially from impacts or severe weather, may require more extensive repairs, including replacement parts and professional hail damage repair, to ensure the fascia’s structural integrity and restore the vehicle’s original appearance.
Replacing the Front Fascia: Step-by-Step Guide

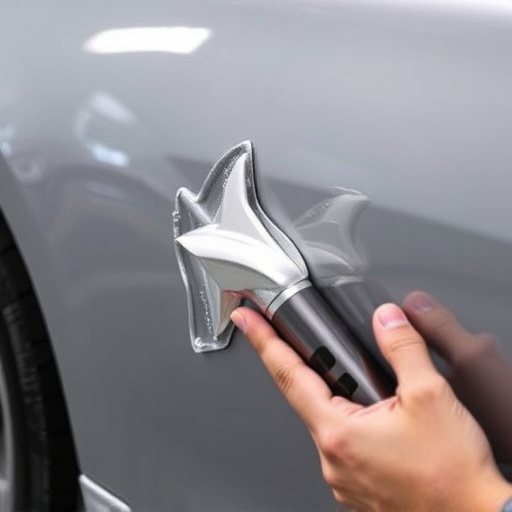
Replacing the Tesla Model 3’s front fascia involves a few key steps. First, assess the extent of the damage—whether it’s from minor scrapes or significant dents or hail damage repair needs. For car paint repair, start by cleaning the area to ensure smooth application of new paint or adhesive. Next, carefully remove any debris and inspect the underlying structure for any required repairs.
If there are deep dents or vehicle dent repair is necessary, use a professional-grade dent puller tool to gently push out the depressed area. Once the fascia is prepared, it’s time to install the new front fascia. This process typically requires removing existing screws, carefully lifting off the old panel, and replacing it with a fresh piece. Ensure proper alignment before securing the new fascia with new screws, double-checking that all gaps are even for an aesthetically pleasing finish.
Ensuring Proper Headlight Alignment and Fitment Check
Proper headlight alignment and fitment are crucial aspects of Tesla Model 3 front fascia repair, ensuring both safety and aesthetic appeal. Before initiating any repair process, conduct a thorough check to verify that the headlights are correctly aligned with the vehicle’s contour. This involves inspecting for any signs of damage or misalignment caused by potential collision repair or automotive restoration work.
During the fitment check, examine the headlight assembly, including the housing, lenses, and bulbs, against the vehicle’s front fascia. Ensure they are securely fastened and properly positioned, aligning with the road ahead. Any deviations can impact driving visibility, potentially leading to hazardous situations on the road. Therefore, a meticulous inspection is key to ensuring optimal performance and safety for subsequent Tesla Model 3 front fascia repair or car restoration endeavors.
Repairing and replacing a Tesla Model 3’s front fascia is a process that requires precision and attention to detail. By understanding the common causes of damage, such as road debris or minor collisions, and following a structured guide, car owners can effectively tackle this task themselves. This article has provided a step-by-step approach to replacement, ensuring a secure fitment check for headlights, which are crucial for safety. With these tips in mind, you can enhance your Tesla Model 3’s aesthetics and drive with peace of mind, knowing that your vehicle is not only well-maintained but also safe on the road.